


Avery Clear Laminating Sheets, 9" x 12", Permanent Self-Adhesive, 50 Self-Laminating Sheets, Great for Protecting Documents, Photos, and Signs More (73601)
Details
- BrandAvery
- ColorClear
- Sheet Size9-x-12-inch
- Item Weight1.4 Pounds
- ManufacturerAvery


Description
🛡️ Seal your legacy with AveryClear – protect what matters, effortlessly!
- BULK VALUE - 50 sheets to cover all your important documents and photos
- ON THE GO READY - Lightweight and portable for professional use anywhere
- INSTANT PROTECTION - Self-adhesive sheets eliminate the need for heat or machines
- CRYSTAL CLEAR FINISH - Poly material keeps your items vibrant and visible
- EFFORTLESS PRECISION - Grid backing ensures perfect sizing every time
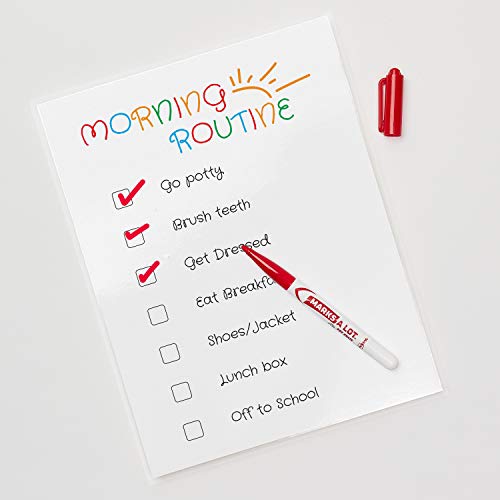
AveryClear Laminating Sheets offer 50 self-adhesive, permanent, crystal-clear sheets sized 9" x 12" with an easy-peel backing and grid for precise document protection—ideal for professionals seeking quick, durable, and machine-free lamination.
Specifications
| Manufacturer | Avery |
| Brand | Avery |
| Item Weight | 1.4 pounds |
| Product Dimensions | 12.25 x 9.25 x 0.5 inches |
| Item model number | 73601 |
| Is Discontinued By Manufacturer | No |
| Color | Clear |
| Cover Material | Poly |
| Material Type | Plastic |
| Number of Drawers | 2 |
| Number of Items | 1 |
| Size | 9" x 12" |
| Sheet Size | 9-x-12-inch |
| Manufacturer Part Number | 73601 |
Have a Question? See What Others Asked
Reviews
H**R
Very Reliable
I’ve been using these one-sided laminating sheets consistently for the past three years to create stickers for my Etsy shop. They’ve never let me down—my stickers always come out clear, waterproof, and scratch-resistant thanks to these sheets.The adhesive is strong, and I rarely have issues with bubbles. On the rare occasion that bubbles do appear, they’re easy to smooth out using a credit card or similar tool. The quality and consistency have kept me coming back time and time again.Highly recommend for small business owners, crafters, or anyone looking for durable laminating sheets that deliver professional results.
C**J
Useful and easy to use (eventually)
Okay. I needed to laminate a number of pictures for a Cub Scout scavenger hunt. Each picture was almost the size of sheet of paper (8.5x11 inches) and colored with markers. I read a number of reviews and questioned whether this would truly meet my needs, but decided to give it a shot since I had no interest in yet ANOTHER machine that would collect dust in between infrequent uses. This truly met my needs (eventually).First things first, if you want to laminate the front and the back of something, you will need two separate laminating sheets. Example: You have ten things that need to be laminated front and back. You will need twenty total laminating sheets because these aren’t pouches or envelopes. Also, the plastic isn’t as thick as most laminating plastic. Even though the plastic is thinner, it’s thick enough and flexible enough to protect my images from kid-craziness. (Ha!)I must admit two or three of my fifteen images ended up a little wrinkled. (Thankfully, they were only wrinkled on the back side.) Once I figured out the best way of handling these sheets, it was smooth sailing. Here’s the process I used:1. Cut images down to size. These laminating sheets won’t seal well if you are using a sheet of paper the same size as the plastic.2. Peel off a laminating sheet and lay it down on a flat surface. The sticky side up should be up.3. Grab your image/paper and hover it over the laminating sheet, front side down. (I stayed one to two inches away from the laminating sheet to get the best placement.) Once you lay it down, there’s no turning back. Lay down one side then slowly lower it bit by bit until you reach the next side. Move this sheet away.4. Peel and lay your second laminating sheet down onto your table.5. Grab the original image and laminating sheet and use the hover technique again. The sticky side/back should be down. Instead of laying the image down slowly, I literally just dropped the image down onto the bottom sheet. By doing this, I avoided all of the wrinkles that I got using the other technique.6. Smooth the laminated image with your hand.The bright colors of my images only dimmed a little. (Yay!). I will definitely purchase these again.
D**D
Perfect Price, They Protect, Easy to Apply
I think this is the best price for good. quality Laminating Sheets. 50 sheets last a long time. I am not sure it they are the best but they have been serving the purpose of my document protection for a long time. I also use them in signs, and important notes I need to save etc.
R**R
Documents Safety
This product is highly productive and solid. For posterity purposes, nothing comes close to protecting your most valuable documents.Will sure put this on top of my list when it comes to documents security safekeeping.
C**S
Pretty good, and way more than I need
Great if you plan on using laminate often, and simple to apply. Quite strong and easy to flatten.
A**R
Works great! But use on a flat surface!
Excellent product. However, this is how I used it. I did not remove the *peel here* tape as a starter. I used the other side of it, where the large sheet is. I merely used the *peel here* ribbon as a back stop. I would peel about 2" to 3" of the larger sheet and place the item to be laminated edge against the *peel here" (it is not removed until the end). The peel here is a bumper to line everything up. As it is lined up, slowly start pressing and evenly moving the paper to be laminated forward. Afterwards, you can then trim the edges. Works on both sides. I figured it out after destroying about 3 sheets of the laminate. BTW, I was laminating letter size paper and it was not easy to figure it out. Hope this helps someone.
Common Questions
Trustpilot
1 week ago
1 week ago
