🛁 Restore, Refresh, Repeat — Your Tub’s Glow-Up Starts Here!
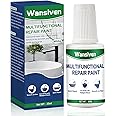
Donaldeu’s Bathtub Repair Kit features a high-adhesion epoxy resin formula that waterproofs and refinishes bathtubs, tiles, and sinks. This comprehensive kit includes everything needed for seamless repairs on various surfaces, using safe, odorless ingredients and color pastes for perfect matching. Ideal for quick, durable fixes that save money and elevate your bathroom’s look.


| Manufacturer | Donaldeu |
| Part number | XBG-002 |
| Item Weight | 100 g |
| Package Dimensions | 13.5 x 6.6 x 3.6 cm; 100 g |
| Item model number | XBG-002 |
| Colour | white |
| Style | Enamel |
| Material | Resin |
| Included components | Repair paste kit |
| Batteries included? | No |
| Batteries Required? | No |
M**N
Great product and easy to use
Great value works well and easy to use
M**H
Good value for money.
It's does the job and easy to apply with a little patience. However I feel like it's hard to match the colour and it should come with a higher grid sand paper for the smooth finish. It's drys within and hour and looks to be durable. It will definetly make it look better then before and not a gimmick.
L**U
Get the Colour Right!
I don't often leave reviews but this is impressive stuff. I'm a bit disappointed as I added too much black and so the sink looks cracked. I mistakenly thought I could address colour with a 2nd application. My advice would be - if it's not a good colour match, dig it out while it's still soft and try again. It still looks a lot better than the original crack and I don't have the hassle of replacing sink, pedestal, tiling and flooring. It sanded to a lovely smooth finish.I applied a first coat and used a stanley blade paint scraper to remove any proud areas once dry. I applied a 2nd coat with a fine brush so I didn't need to sticker everything up again.
K**L
Ok product
Bot that goid
N**G
This product works perfectly.
This product works perfectly. Only thing was colour matching ( I made it too white). Easy to use, appy and finish. Found using a little water with sandpaper helped.
D**O
Outstanding Solution to fix a small chip on a Ceramic/Porcelain Basin
Our relatively new bathroom suite suffered a small chip to the ceramic sink basin. Whilst only a few millimetres wide, once seen, it could never be unseen. So this meant either paying several hundred pounds to have the unit replaced, or attempting to repair the chipped section.I figured that it made sense to attempt a repair first:This product proved to be outstanding, and after using it, the chipped section is now completely invisible, and the basin is as good as when it was new.The key reasons why I like this product are:1) It has quite a long cure time, needing to be left for 24 hours to set. This enables the two tubes of paste to be mixed really thoroughly. I mixed the stuff for a good few minutes to ensure that it set really hard.2) It does indeed set nice and hard.3) Luckily its colour matched our Roper Rhodes basin really well. So well that it is not possible to see where the paste was applied.I found that the following key aspects were necessary to get a really professional result:1) Ensure that the damaged area is thoroughly clean. I used methylated sprit on a lint free cotton cloth to clean the surrounding area.2) Work slowly with attention to detail.3) Apply the product thinly, as it is easier to apply a second layer if needed, than have to remove a lot of excess hardened filler.4) Crucially, I ditched the supplied abrasive and used my own wet and dry paper, used with water, and working down with several finer grades.5) I started with 400 grit paper and moved down to 600, 800, 1000, then the really fine 1500 grit paper.6) The 1000 grit paper should be used when you can feel that the surface of the filler is just a tiny bit proud of the surrounding ceramic surface.7) When moving down the grades of abrasive, use a fresh sheet of kitchen paper towel and fresh water to rinse/clean the abraded surface. Also dip the new bit of abrasive paper in fresh water (so as not to pick up any coarser particles from the previous grade of paper).8) For the final polishing, I used T Cut paste, followed by buffing with car wheel polish.All in all I am absolutely delighted with this product. It gets a 10 out of 10 from me and saved me several hundred pounds.
D**S
Works as expected (originally)
After a while the repaired area discoloured badly. Best guess is that it trapped dirt and soap over time.Wouldn't use it again as it now looks worse that this small scratch didOriginal review:Simply put, this works. I'm an OK diy'er so can't comment as to how this would compare to other products because I haven't used any but it did the job so well and I can't see or feel the repair now.Would be 5 stars if you put instructions or a link to the instructions in / on the box. Instead I had to scroll through the product page on Amazon which, though simple to follow, is not something that most people would bother to do which probably leads to the negative reviews you've seen.
T**Y
Yellowish/rubbery Texture works
Feels rubbery when dry yellowish colour .I'd advise anyone trying this to practise with the color and application before attempting to do your repair, it's dried yellowish without the colour adjusted.I taped the area off which has left definited line 😒 BUT! it dose seemed to have sealed an extensive crack on out shower tray👍 (2 weeks ago) I'll update if it peels off.
Trustpilot
2 weeks ago
3 weeks ago